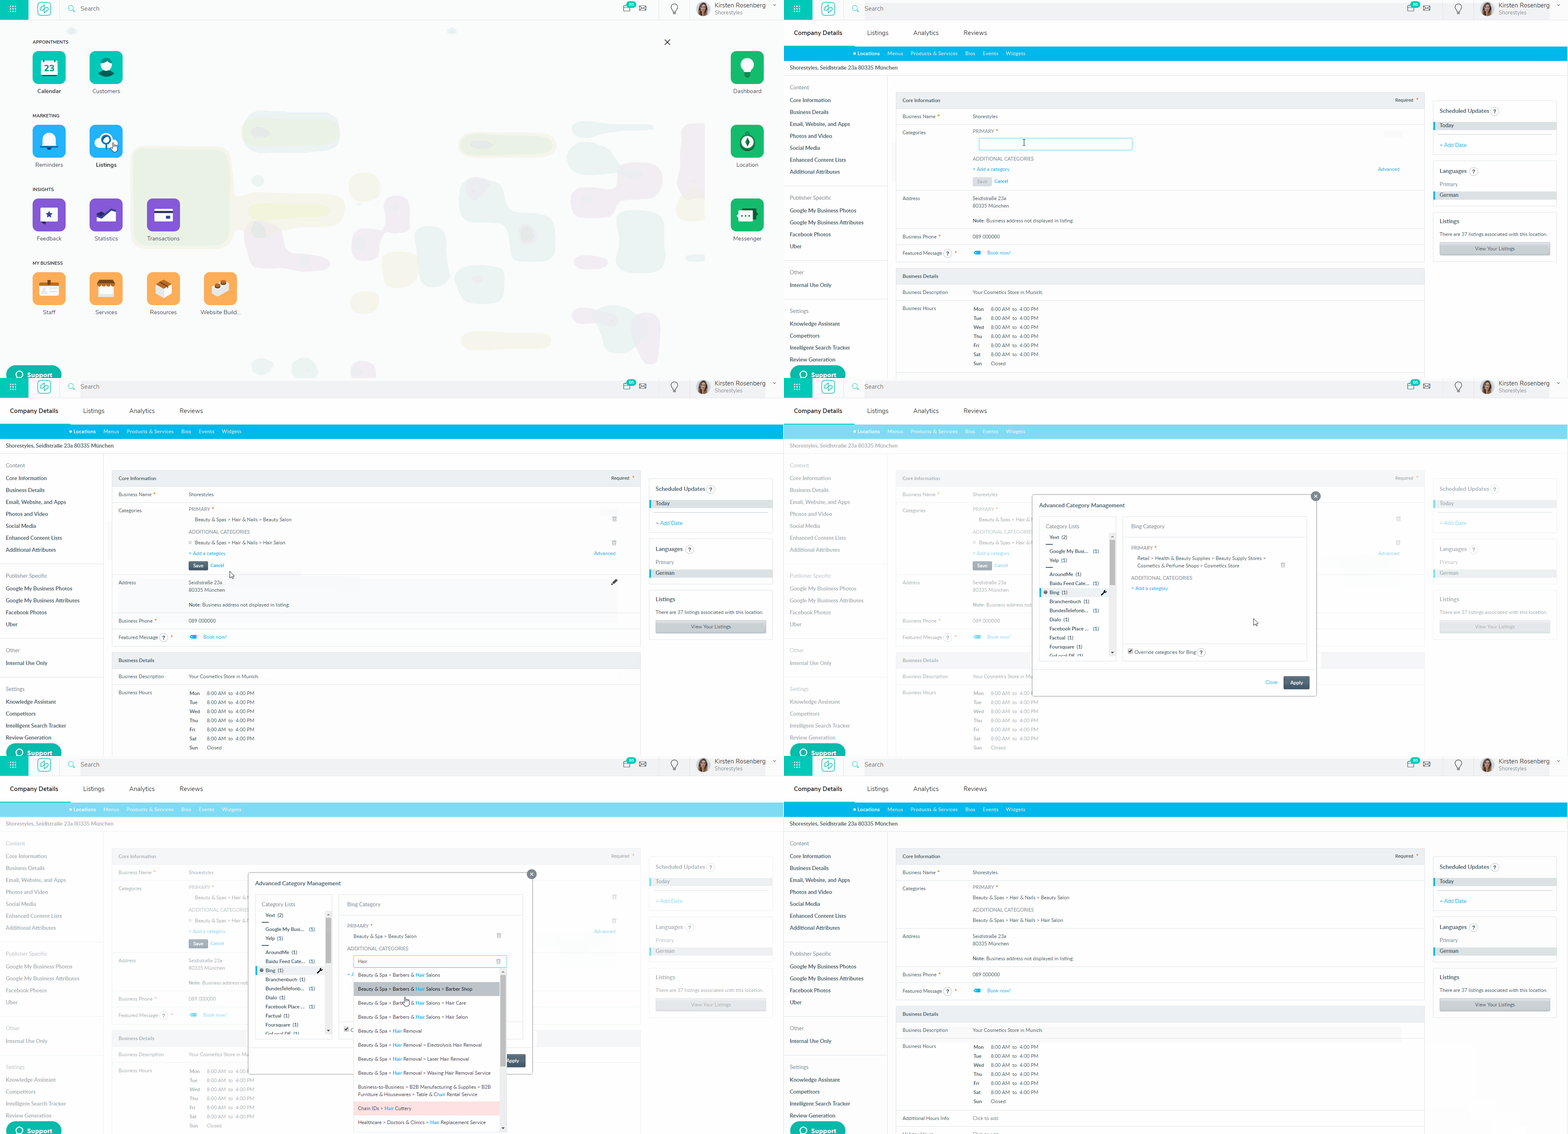
How can I edit the business category shown in the listings?
- Once you are logged into your Shore calendar, go to Listings.
- Choose Company Details, go to Profiles and click on Categories.
- You can change the current category by deleting it and choosing a new one. Start by typing a potential relevant category; a list will appear from which you can choose categories.
- Select your category by clicking on it. If you would like to add another one, click Add another category (you can add up to 10).
- Click Save.
Shore Insider Tip: Many sites consider the ranking of your categories, so make sure your first category is the most applicable for your business.
You can also control your categories on site-to-site basis:
- Click on the Advanced hyperlink in the bottom right corner.
- After clicking on this hyperlink, a new window will appear with the location's categories broken down by publisher site. You can review each publisher site's categories for that location by navigating the sidebar labeled Category Lists.
- If you need to change/add a category on a specific publisher site, select the Override categories option and then click on +Add a category. You can begin typing the category you wish to add and the possible results will auto-populate. If you wish to remove a category simply click on the trash icon next to it.
- Once you are done editing your advanced categories, select Apply and these changes will be saved. You should expect to see these changes reflect on the actual listings within a few days for most publisher sites.
Shore Insider Tip: When syncing your Google My Business account to Shore, it is advised to make sure that you are providing the same category on our end as what Google already has listed before opting in. This will help avoid the off-chance of Google requiring you to re-verify your business.
