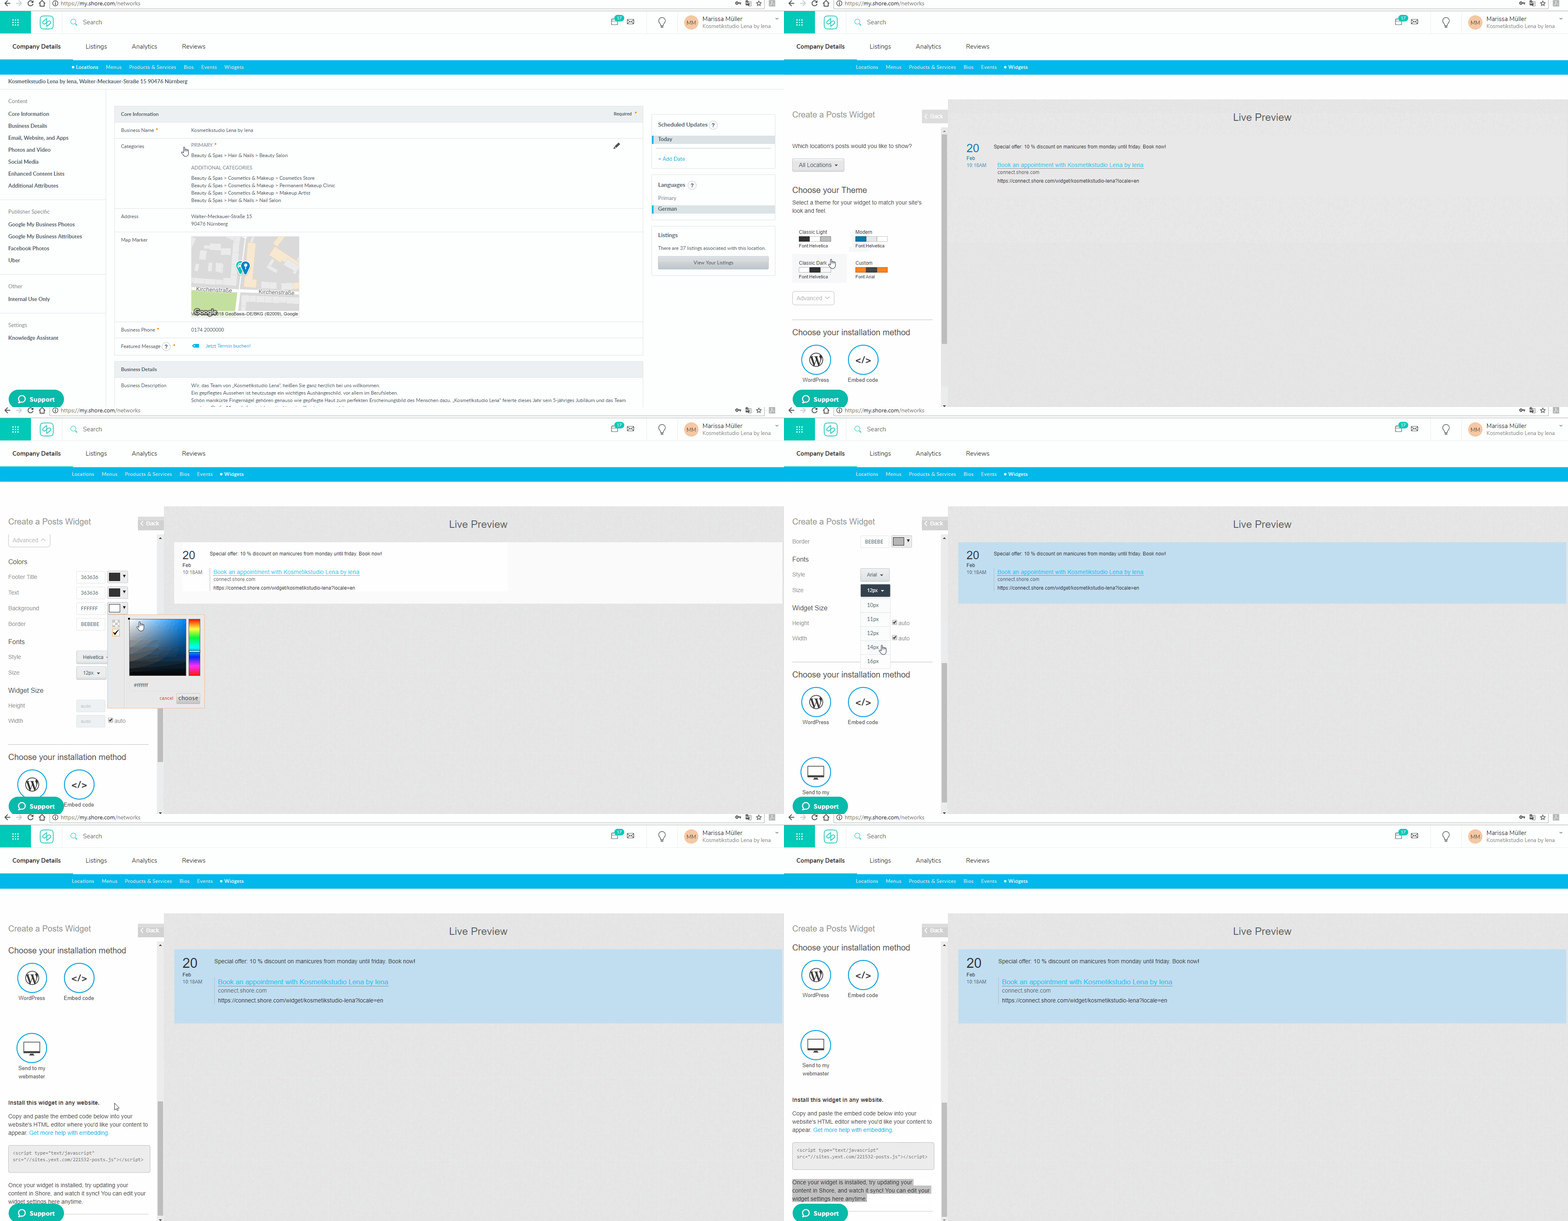
How do I install a widget via Shore for the listings ?
- Once you are logged into your Shore calendar, go to Listings.
- Click on the Company Details and go to Widgets from the blue banner.
- In the left-hand menu, click on the type of list you would like to install on your website. A + Create button should appear to the right side of the column if you haven´t created content yet.
- If you have more than one list of the selected type, select the list you would like your widget to contain. To create a widget that displays all your lists of the chosen type, select All Product Lists, All Bios, All Calendars, or All Menus.
- Under Choose your Theme, select one of the available themes.
- A live preview of what your widget will look like with the chosen theme appears on the right-hand side of the page.
- (Optional) To view or edit specific settings within a theme, such as colors and fonts, click Advanced. If you make any edits to one of the pre-built themes, the Custom theme is automatically selected.
- Any changes you make are shown in the live preview on the right-hand side of the page.
- Under Choose your installation method, select Embed Code:
- Embed code - Selecting this option gives you a JavaScript code that you can put anywhere on your website. Simply copy and paste it into your site's HTML code.
- Once your widget is installed, update your content in your Shore listings and watch it sync.
In this example a post widget is created:
