![3.2_logo_outlined_black.png]](https://help.shore.com/hs-fs/hubfs/3.2_logo_outlined_black.png?height=34&name=3.2_logo_outlined_black.png)
In this article you will find general information about the company settings.
General information
Under General Information you can enter the company name and address of your company, so that this information is also visible in the Shore booking screen.
Furthermore, you have the possibility to enter a company logo on the right side.
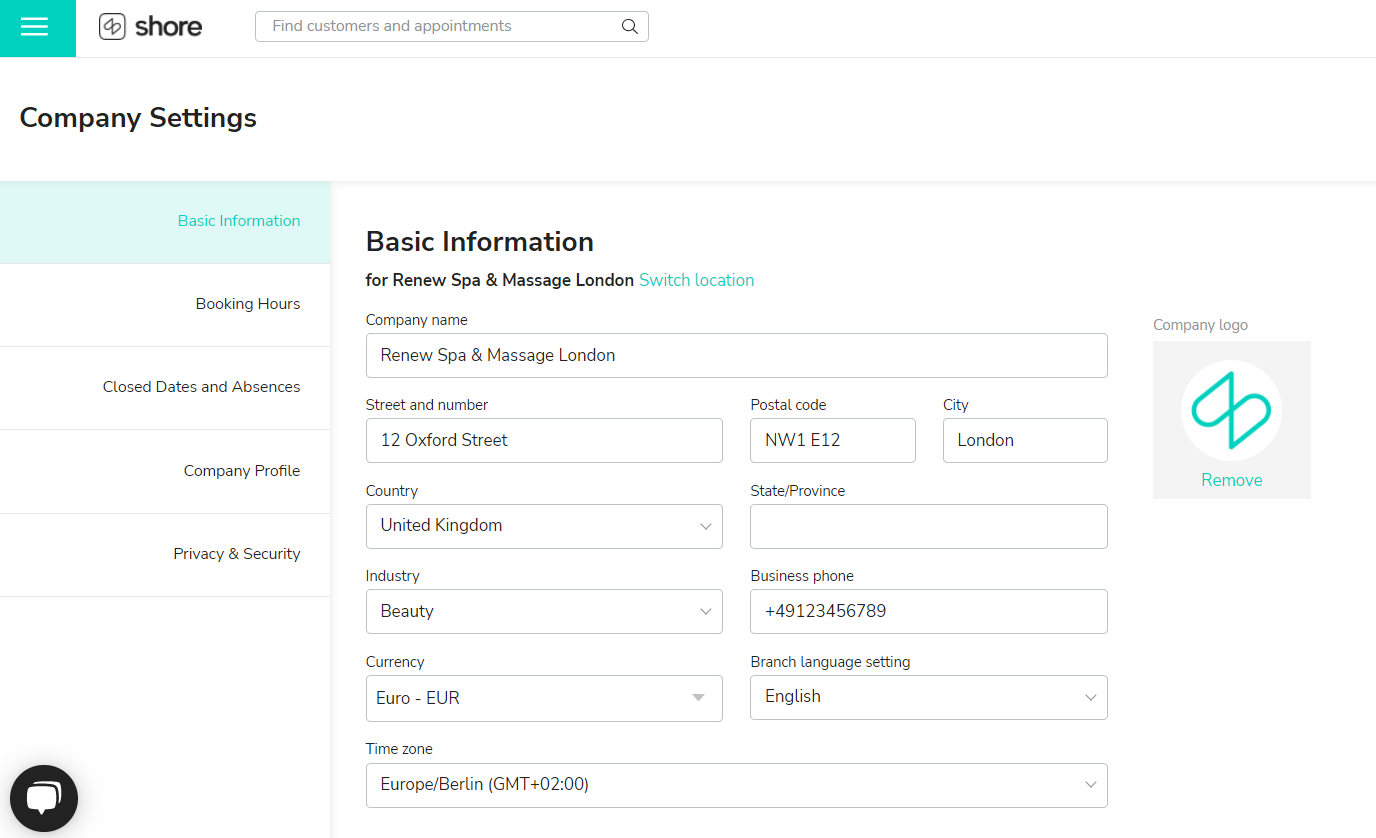
Note: Make sure to also enter your state/region, as this is required, among other things, for successfully activating online booking via Google.
Booking hours
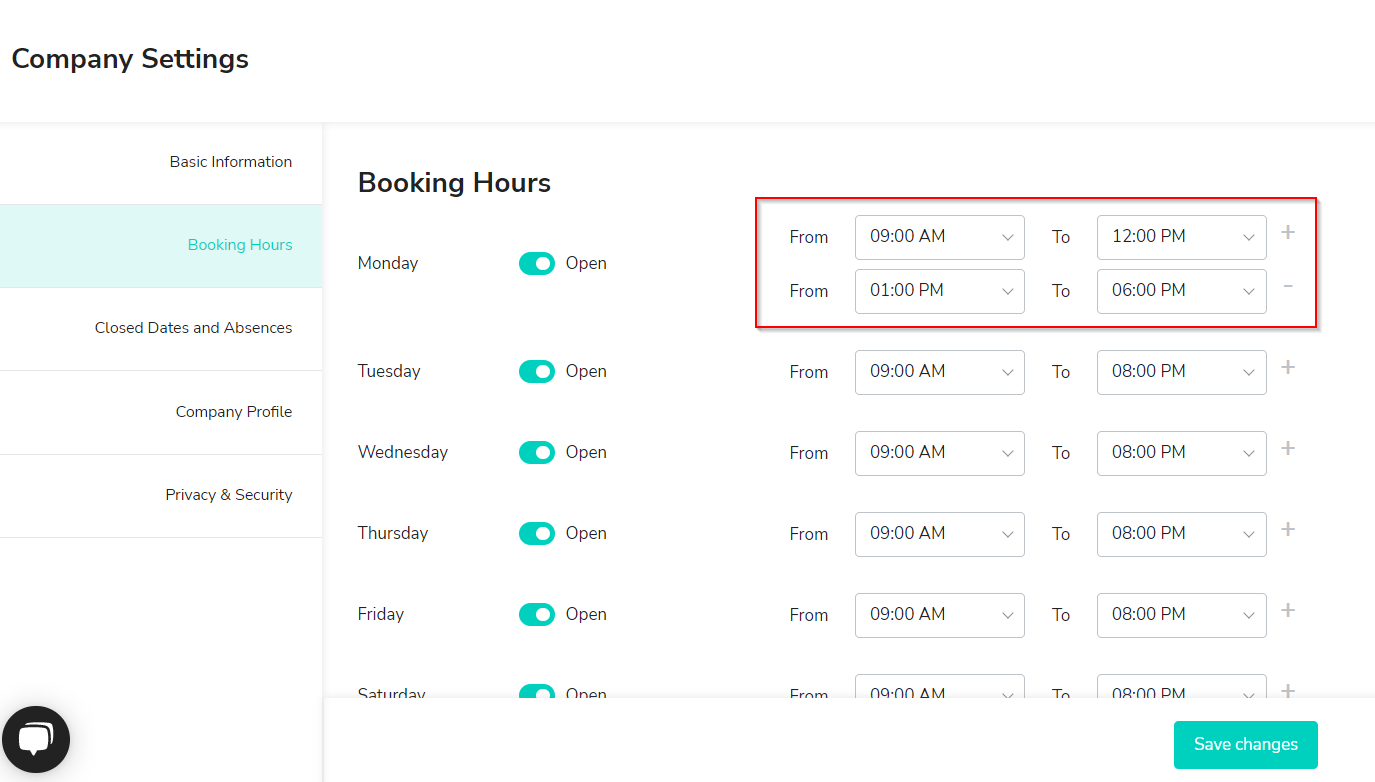
Under the Booking Hours section, you can enter your business's opening hours. By clicking the plus icon, you can add a new row — for example, to add a lunch break. To do this, enter your hours before the lunch break (e.g. 8 AM to 12 PM) and after the lunch break (e.g. 1 PM to 5 PM), then click Save Changes.
In addition to your general booking hours, you can also control availability more individually:
Adding Individual Booking Hours for Your Employees
Set separate booking hours for staff members whose schedules differ from the regular opening hours.
Enabling the Shift Schedule (from Booking & Marketing upward)
Closing days and absences
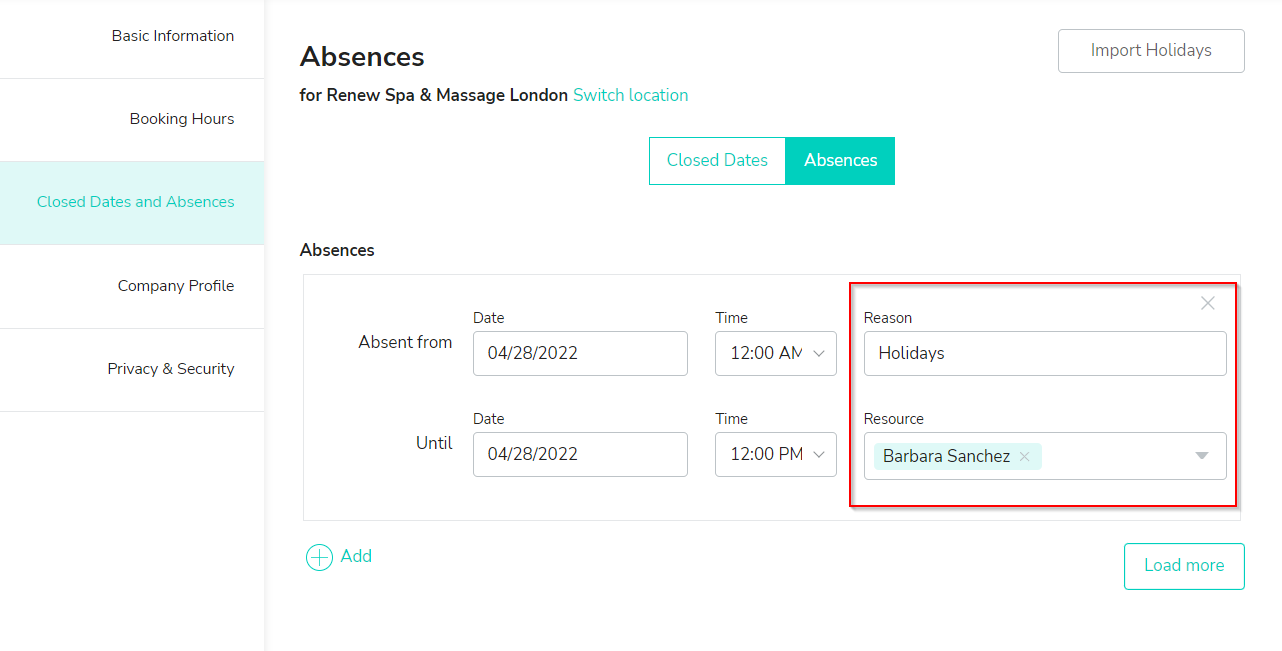
Under the point Closing days and absences you have the possibility to add holidays. Under Closing days you can enter days or absences that apply to the entire company. This means that the periods or days you enter under Closing days will no longer be available for bookings. Under + Other absences you can also define a period individually, e.g. to enter company holidays.
The absences, in contrast to the closing days, refer to individual employees (or to individual rooms). You can see the exact difference by clicking on Add, because here you can also enter a resource. The resource refers to the staff member or the room. If, for example, a staff member is on holiday or a room or piece of equipment is under maintenace work, you can enter this here.
Company profile
Under the point company profile you have the possibility to add links to your website, Facebook, Twitter or Instragram profile. This allows your customers to access your social media profile directly via the booking screen. You can also link your general terms and conditions and your imprint or adapt the text for the newsletter registration, which is displayed during the third step of the booking, shortly before the customer completes the booking.
Contract
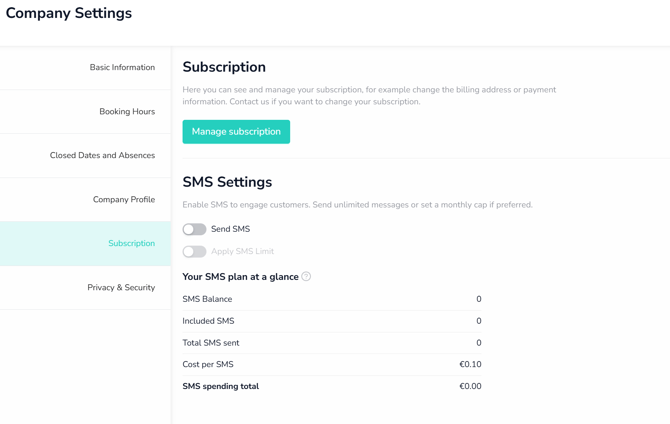
Under Manage Subscription, you'll get an overview of your current contract. Here you can view and edit your account details, billing address, and payment method, as well as access your billing history.
In the SMS settings, you can enable SMS notifications for your customers, set a monthly SMS limit, and view your SMS quota along with your costs so far.
Privacy & security
In accordance with the General Data Protection Regulation (GDPR), you will find our order processing contract under the point Data Protection & Security. Please read the contract carefully, insofar as it is necessary for the fulfilment of your own data protection obligations, and agree to it.