In this guide, we will walk you through the process of adding a new employee to your calendar system.
Step 1: Create profile
- Click on Management in the main menu and then on Employees.
- Click on + New employee.
- Enter at least the first name, surname and an e-mail address. The employee cannot be created without this information!
- Tap on Save employee to save the profile. After saving, the employee profile appears where you can enter further changes.

Note: If a working e-mail address has been entered, the employee will receive an invitation to the system after creating their profile. If you do not want your employee to have access to the system, deactivate the Set-up own access option in the employee profile (see below).
Each e-mail address may only be used once.
Step 2: Customize employee profile
- Personal data
- At the top you can add the personal data and assign a color to the employee.
- Account and login
- Deactivate the Set-up own access option if the employee should not log into the system themselves (1).
- Specify which appointments the employee can view and edit (2).

If an employee has been created as a hidden employee, this setting can no longer be changed at a later date. To correct this, the employee must be deleted and created again.
Services
Indicate what services the employee can provide.
Booking settings
- Activate/deactivate the option bookable online by the customer (1).
This gives customers the opportunity to select the employee themselves when booking online. - If the working times differ from the general booking times, you can enter individual booking times for the employee. This is not necessary if you work with the shift plan (2).
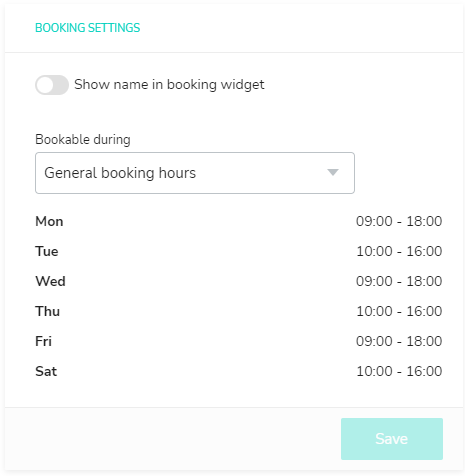
Note: An employee is available for online booking once services have been assigned and booking hours have been configured (either general booking hours or individual booking hours).
The "Display name on booking page" option only controls whether customers can explicitly select this employee during the booking process.
If this option is disabled, the employee can still be automatically assigned to online bookings when customers select "Any employee".
Note: When an employee is deleted, existing appointments remain in the system but are no longer assigned to any employee and will be displayed as "undefined appointments."
Before deleting an employee, please check whether there are any upcoming appointments and, if necessary, reassign them to another employee.