In this tutorial, we'll show you how to implement the Shore online booking feature on your website. The implementation steps depend on how you want to display the booking function on your page and whether you use a website builder.
Decide how you want to display the online booking option on your website
There are several possibilities:
- Adding a button to the menu
With this option, you link a menu item on your website with your booking page. The implementation is very simple and possible with almost all website builders. - Adding a button to one or more pages of your website
With this option, you add a button (or simply a link) to one or more pages that leads to your booking page. The implementation is very simple and possible with almost all website builders. - Displaying a booking button in a fixed position on all pages
In this case, the booking button is positioned as a so-called "floating button" on all pages in the same place (bottom right or left).
Advantage: Customers see the booking button immediately and can book an appointment on any page. You decide whether the button should be displayed on the right or bottom left. - Displaying the booking widget in a window (iFrame) directly on your website
In this case, your booking page is shown in a separate window in a certain position on your website.
Read on to see how to proceed step by step for each of these options.
Option 1: Adding a button to the menu
- Add a new item to the menu of your website (e.g. "Online Booking").
- Open your Shore Account. Click on your user name in the top right corner and then on Settings > Booking Widget.
- Disable the option Use Floating Button.
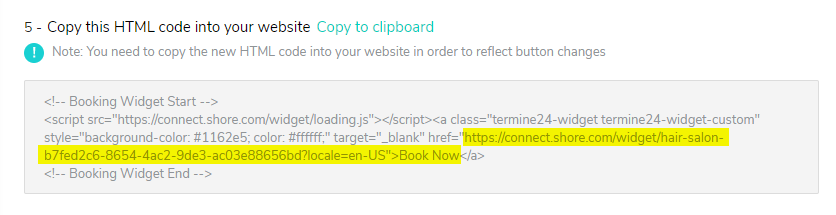
- Copy the web address of your booking page from the HTML code.
- Link the menu item on your website with the web address of your booking page. Done!
This video tutorial shows how to link the web address with a menu item on your website when using a website builder.
Option 2: Adding a button to one or more pages of your website
You can install a button or link leading to your booking page anywhere on one or more pages of your website (e.g. under "Contact" or "Services").
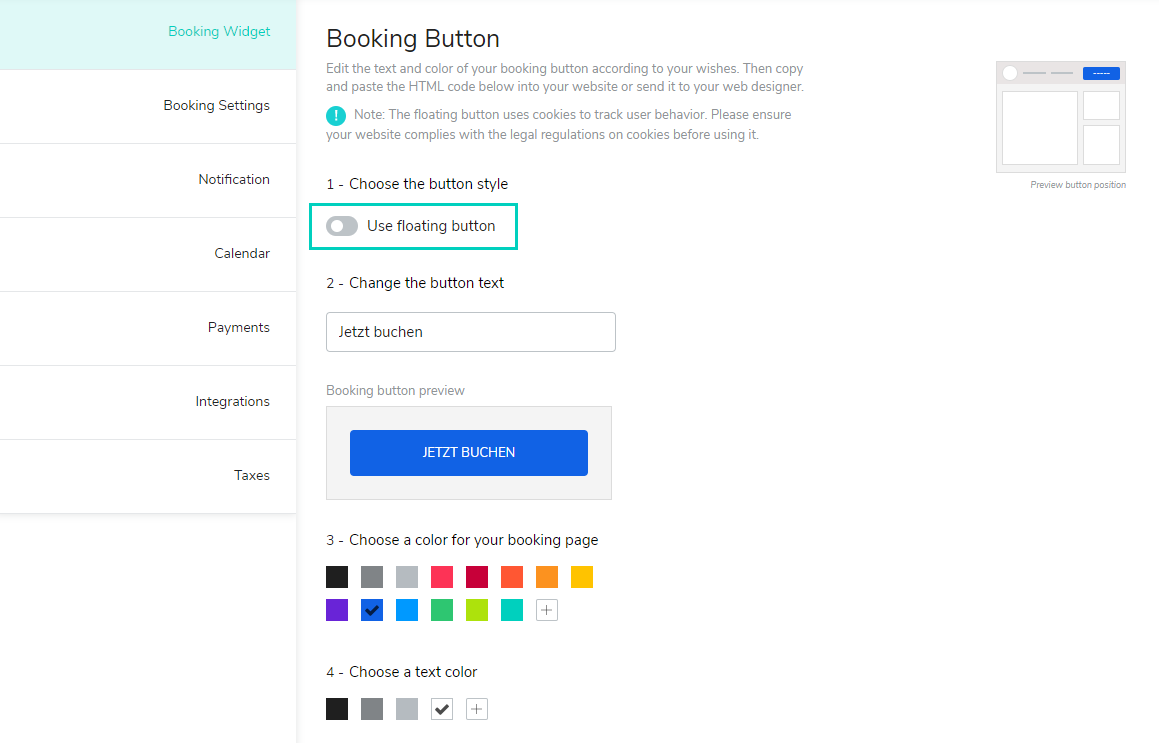
- Open your Shore Account. Click on your user name in the top right corner and then on Settings > Booking Widget. On this page you can personalize your booking button and booking page.
- Disable the option Use Floating Button.

- You can change the button text (2), the color scheme of your booking widget (3) and the text color of the booking button (4).
- Click on Save Changes.
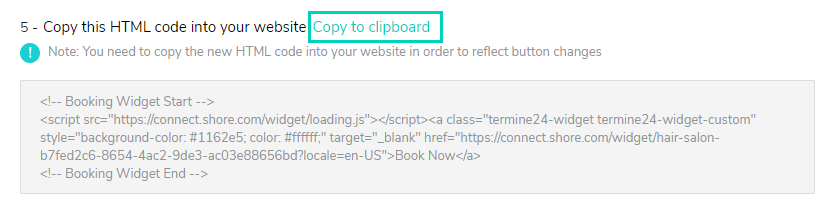
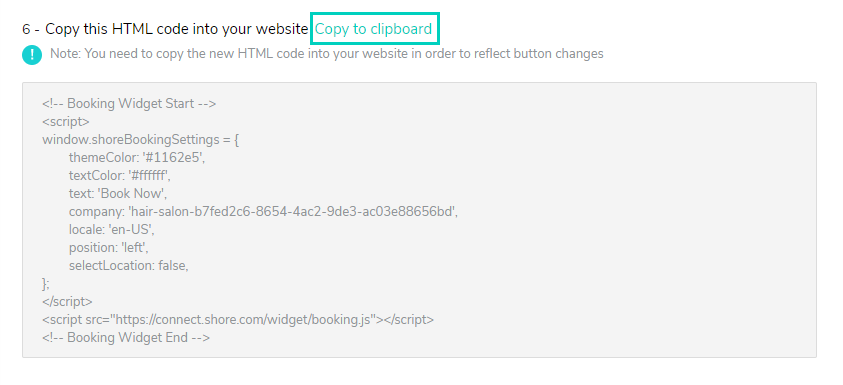
- All settings are automatically saved in the HTML code displayed in the window in item (5). Copy the code by clicking Copy to clipboard above the window.
- The final step consists in embedding the code on your website. This video tutorial shows where to paste the copied HTML code when using a website builder (note: in this example, the button color and text were not modified).
Option 3: Displaying a booking button in a fixed position on all pages
The so-called "floating button" lets you display the booking button in a fixed position on each page of your website. This is a particularly elegant solution with the advantage that the button will not be overlooked and allows customers to make a booking no matter where they are on your website.
The booking button in the bottom right corner of this sample page shows how the floating button looks like.
Note: Adding a floating button to your website is not difficult, but you need access to the <head> tag within the website source code, which is not possible with all website builders.
- Open your Shore Account. Click on your user name in the top right corner and then on Settings > Booking Widget. On this page you can personalize your booking button and booking page.
- Enable the option Use Floating Button.
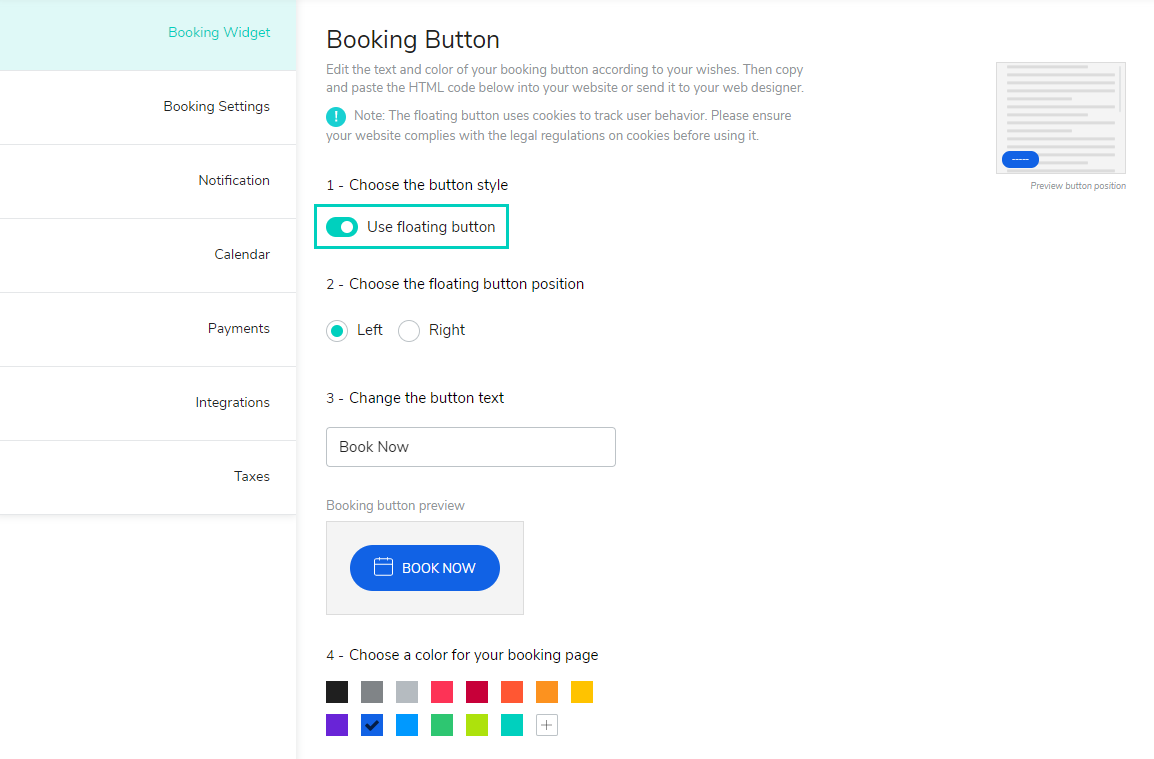
- You can change the button text (3), the color scheme of your booking widget (4) and the text color of the booking button (5).
- Click on Save Changes.
- All settings are automatically saved in the HTML code displayed in the window in item (6). Copy the code by clicking Copy to clipboard above the window.
- The last step is to paste the code snipped into the source code of your website, i.e. right before the </head> tag. Below, we'll show you how to embed the code with a website builder or WordPress.
Installation using a website builder
This video tutorial shows how to install the floating button when using a website builder (note: in the example, the button color and text were not modified).
Installation with WordPress
How to install the floating button with WordPress:
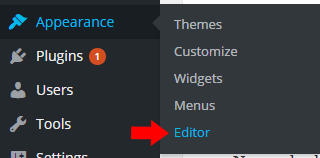
- Open the admin section of your WordPress page (http://your-website.com/wp-admin/) In the menu on the left, click on Appearance > Editor.
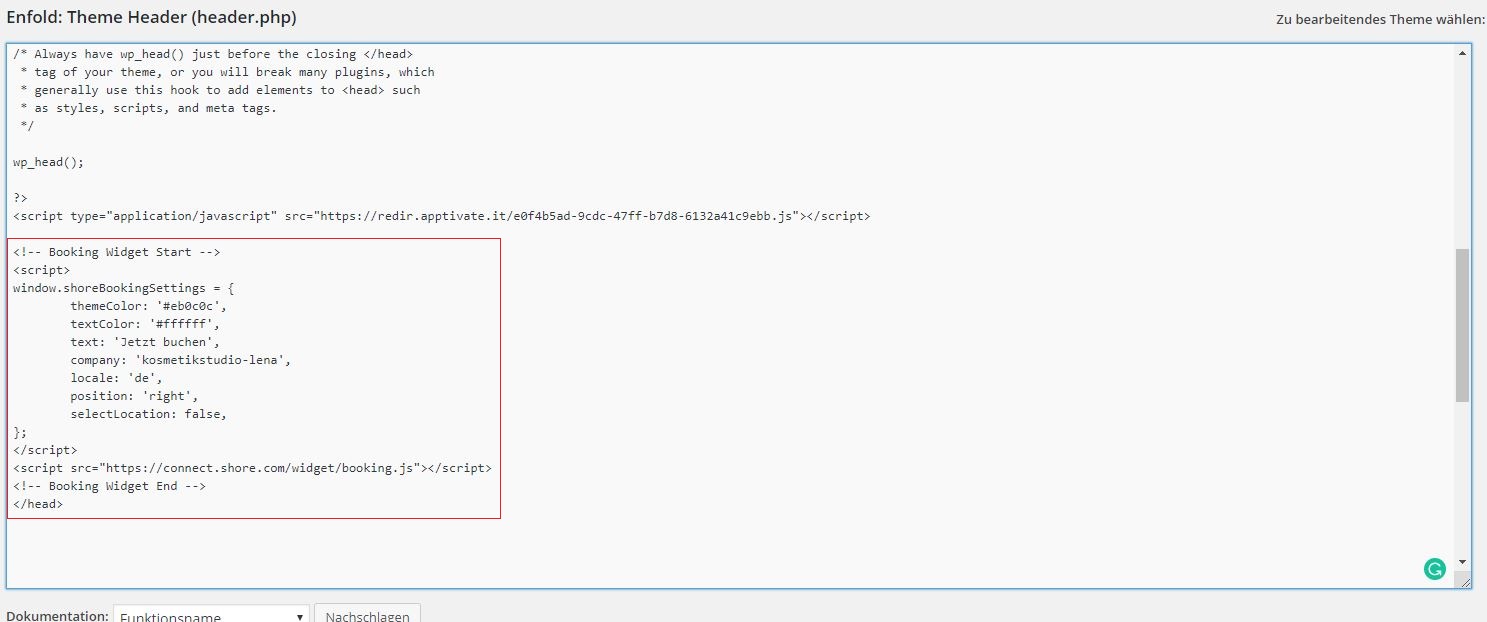
- Select the template Header (header.php).
- Paste the copied code directly above the </head> tag.
Option 4: Displaying the booking widget in a window (iFrame) directly on your website
If you choose this option, the booking function is integrated without a link or button as a window that's located in a specific place on your website.
The implementation requires advanced technical knowledge because you need to customize the code and embed it manually into your website.
example of code:
<iframe
  src="https://connect.shore.com/bookings/test-shore-booking/services?locale=en"
  title="Shore booking"
  style="width: 100%; height: 100vh; border: 0;">
</iframe>

<script>
  // Define the trusted origin for the Shore iframe
  const Z = "https://connect.shore.com";

  // Wait until the parent page has fully loaded
  window.addEventListener("load", function () {
    // Listen for postMessage events from the iframe
    window.addEventListener("message", function (t) {
      // Ensure the message comes from the trusted Shore domain
      if (
        t.origin === Z &&
        window.dataLayer &&
        typeof window.dataLayer.push === "function" &&
        t.data &&
        t.data.event &&
        t.data.eventAction &&
        t.data.eventCategory
      ) {
        // Push Shore event data to the parent's dataLayer
        window.dataLayer.push({
          event: t.data.event,
          eventAction: t.data.eventAction,
          eventCategory: t.data.eventCategory,
          eventCustomer: t.data.eventCustomer,
          eventLabel: t.data.eventLabel,
          eventLocation: t.data.eventLocation,
          eventValue: t.data.eventValue
        });
      }
    });
  });
</script>
In this example, just replace "https://connect.shore.com/bookings/test-shore-booking/services?locale=en" with your own booking page url
You would also need to customize the layout of your iframe on the page
style="width: 100%; height: 100vh; border: 0
All the rest of the script needs to stay the same
Do you need further help with installing your booking widget? Just send us an e-mail or contact us through the live chat in your account. We're happy to assist you.