Important: We strongly recommend implementing a GDPR-compliant cookie banner that is compatible with Google Consent Mode V2. Otherwise, you will not be able to use Google Analytics and Google Ads to their full extent.
To facilitate integration, we have included a template of the Cookiebot cookie banner in this tutorial. Please click on this link to sign up so that we can easily access your account if you need further assistance from our tracking specialist.
Step 1: Import the GTM container template
A Google Tag Manager container must be installed on your website. If you do not yet have a GTM container, please create one and install it on your website.
⚠️ Important:
You only need to add your Google Tag Manager (GTM) ID to Shore booking if the booking engine opens in a new window, as shown in this example. In that case, please reach out to our support team, and we will integrate your GTM ID for you.
For iframe-based setups — like the floating button or an embedded iframe on your website — there is no need to insert a GTM ID into the booking flow. Instead, all booking events must be tracked directly on your main website (the parent page).
👉👉 Here you can find all integration options for the Shore booking system.
You can now import a ready-made container that includes all Google tags, triggers, and variables for the Shore booking engine. After importing the tracking template, simply add your own IDs and website URL as described below—and your tracking will be up and running right away!
- If you want to know how to import a container into Google Tag Manager, please read this article
- When you’re ready, simply download this JSON file (right-click and choose “Save file”). Once downloaded, import it into your Google Tag Manager workspace, where you manage all tags for both your website and Shore.
https://blog.shore.com/GTM-Shore-Tracking-Template.json
Important: Please review your tags and variables to add your own Google IDs and website domains. The downloaded file is only a template and must be customized to your own properties.
Step 2: Customize your tags and variables with your own IDs/URLs
Google Ads Conversion Linker tag
Conversion Linker Tag:
.png?width=607&name=Google-Tag-Manager%20(1).png)
Google Ads Variables IDs
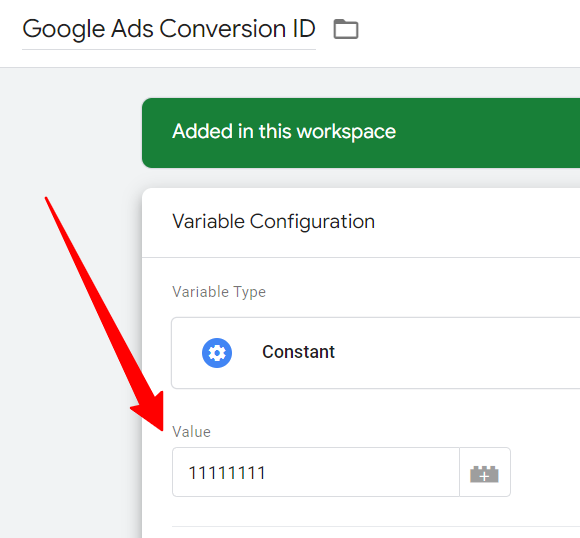
Google Ads Conversion ID:
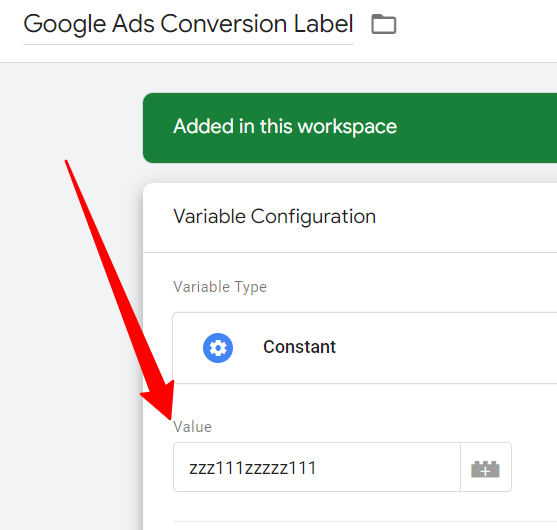
Google Ads-Conversion-Label:
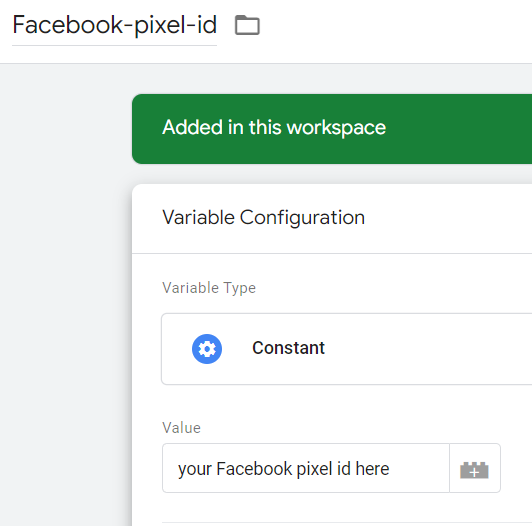
Facebook Pixel
Important: To avoid restrictions imposed by third-party domains, we recommend placing your Facebook conversion pixel on your own website rather than on the Shore booking engine at connect.shore.com. This means you will need to create your own thank you page (on your domain) and place the Facebook conversion pixel there. Fortunately, we have created an initial setup for you. All you have to do is add the URL of your thank you page and your Facebook pixel ID. You can find all the details in the section “Create your own thank you page – Facebook tracking workaround.”
Facebook Pixel ID:
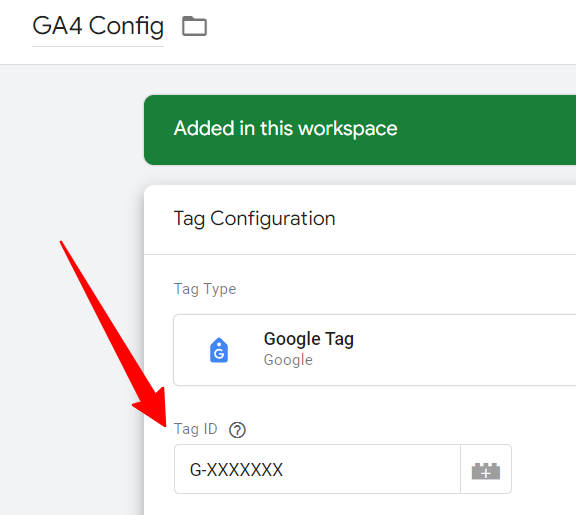
Google Analytics (GA4) - Measurement ID


Then go to Google Tag Manager and paste the Measurement ID into the “Tag ID” field.
GA4 Config tag / Measurement ID
Google Analytics (GA4) - Cross Domain
You need to adjust your GA4 measurement ID so that it supports cross-domain tracking (between your domain and the connect.shore.com domain).
Watch this video carefully to set up and test cross-domain tracking in GA4.

Step 3: Publish your GTM container!
- Once you have finished configuring the settings, remember to publish your changes!

Under the EU Cookie Law*, the cookie banner serves two purposes:
- to ensure that visitors to your site are informed about the use of cookies
- to enable visitors to either accept or block Marketing and Analytics cookies (ex Google Ads, Google Analytics, usw)
The Cookie Law is a piece of privacy legislation that requires websites operating in the EU to get consent from visitors to store or retrieve any information on a computer, smartphone or tablet.